因为近期公司计划做个摄影比赛,需要收集员工的照片作品,因为肯定是需要原图的,那样通过公司邮箱显然是不方便的,于是想到在小程序中添加图片上传功能,以前Sham用过每次添加1张图片,然后上传到服务器及数据库,趁这次机会,再次学习研究优化了代码,目前能够做到:
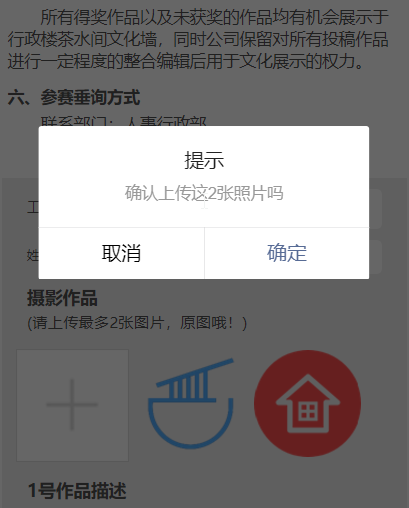
- 用户能一次性添加多张图片(原图),然后会展示出来(目前无法预览添加的图片,待继续优化),同时会弹窗提醒是否上传,确认则上传,取消则清空;
- 上传图片到服务器时,自动生成缩略图,并且同时存储原图和缩略图到各自文件夹,然后返回缩略图值,用于展示及传到数据库中;
- 提交表单后,用户查看记录时,初始加载缩略图,点击缩略图,会放大预览原图,提高用户加载速度和减少流量浪费;
下面,就来上代码:
首先是小程序端,JS中添加
/***上传图片*/
  uploadimg: function () {
    var that = this;
    wx.chooseImage({  //从本地相册选择图片或使用相机拍照
      count: 2, // 默认9
      sizeType: ['original','compressed'], // 可以指定是原图还是压缩图,默认二者都有
      sourceType: ['album', 'camera'], // 可以指定来源是相册还是相机,默认二者都有
      success: function (res) {
        // 返回选定照片的本地文件路径列表,tempFilePath可以作为img标签的src属性显示图片,批量添加的话,就是一个图片地址数组
        var tempFilePaths = res.tempFilePaths
        wx.setStorageSync('tempFilePaths', res.tempFilePaths)
          that.setData({
            sourcess: res.tempFilePaths  //这个用于展示添加的图片,并非服务器图片地址
          })

//添加图片后,会弹窗提示,确认是否上传
        wx.showModal({
          title: '提示',
          content: '确认上传这些吗',
          success: function (res) {
            if (res.confirm) {
              console.log('用户点击确定')
              var tempFilePaths = wx.getStorageSync('tempFilePaths')
              var sources = [];
//循环将添加的图片上传到服务器
              for (var i = 0; i < tempFilePaths.length; i++) {
                wx.showToast({
                  title: '正在上传中',
                  icon: 'loading',
                  duration: 15000
                })
                wx.uploadFile({
                  url: 'https://你的服务器地址/imgupload.php?imgpath=userimg',
                  filePath: tempFilePaths[i],
                  name: 'file',
                  success: function (res) {
                    wx.hideToast();
                    console.log(res.data)
                    if (res.data !== "上传错误") {
                      sources.push(res.data)
                      //前台显示
                      that.setData({
                        sources: sources
                      })
                      console.log(sources)
                    }
                  }
                })
              }
            } else if (res.cancel) {
              console.log('用户点击取消')
              that.setData({
                sourcess: "",
              })
            }
          }
        })
      }
    })
  },
然后是小程序端的WXML
<view class="imgupload">
  <view bindtap="uploadimg" class="imgselect" ></view>
  <view class="imgselected" wx:for="{{sourcess}}" wx:key="{{index}}" wx:for-item="sourcess">
    <image src="{{sourcess}}" ></image>
  </view>
  <input type="text" value="{{sources}}" name="userimg" style="display:none;"></input>
</view>
顺带附上Sham用的WXSS
.imgselect{
  width: 200rpx;
  height: 200rpx;
  border:1px solid #DCDCDC;
  text-align: center;
  margin:20rpx 6rpx;
  align-items: center;
  background-image:url(https://你的网址,或者索性用纯色背景/imgupload.png);
  background-repeat:no-repeat;
  background-size:100% 100%;
  -moz-background-size:100% 100%;
}
.imgselect image, .imgselected image{
  margin:auto;
  width: 195rpx;
  height: 195rpx;
}
.imgselected{
  width: 200rpx;
  height: 202rpx;
  text-align: center;
  margin:20rpx 6rpx;
  padding:0px;
  align-items: center;
  justify-content: center;
}
这样小程序端就完成了,然后就是服务器接收啦,imgupload.php
<?php
$imgurl="https://你存放图片的网址/";
// 允许上传的图片后缀
$allowedExts = array("gif", "jpeg", "jpg", "png");
$temp = explode(".", $_FILES["file"]["name"]);
// echo $_FILES["file"]["size"];
$extension = end($temp);     // 获取文件后缀名
if ((($_FILES["file"]["type"] == "image/gif")
|| ($_FILES["file"]["type"] == "image/jpeg")
|| ($_FILES["file"]["type"] == "image/jpg")
|| ($_FILES["file"]["type"] == "image/pjpeg")
|| ($_FILES["file"]["type"] == "image/x-png")
|| ($_FILES["file"]["type"] == "image/png"))
&& ($_FILES["file"]["size"] < 20480000)   // 小于 20M,这个自己限制
&& in_array($extension, $allowedExts))
{
    $imgpath=$_GET['imgpath'];  //获取传来的图片分类,用于在服务器上分类存放
    $code = $_FILES['file'];//获取小程序传来的图片
    $uploaded_file=$_FILES['file']['tmp_name'];
    $user_path=$_SERVER['DOCUMENT_ROOT'].$imgpath;  //放到服务器下指定的文件夹
  if(file_exists($user_path)){
  }else{
  mkdir($user_path,0777);
  }
    $size=$_FILES["file"]["size"];
    $date=date('Ymd');		//得到当前时间
    $newfilename=$date.'-'.$size.'.'.$extension;		//得到一个新的文件名,可根据自己需求设定,sham用的时间加上图片文件大小来命名
    $move_to_file=$user_path."/".$newfilename;
    $file_true_name=$imgurl.$imgpath."/".$newfilename;
    //echo $file_true_name;
    $filename = json_encode($file_true_name);//把数据转换为JSON数据.
   // echo $move_to_file;
    move_uploaded_file($uploaded_file,iconv("utf-8","gb2312",$move_to_file));

 //下面的代码是用来生成缩略图的
  $thump = $user_path."/thumb/";   //这个缩略图文件夹地址自己设置,这个是在原图文件夹里面增加1个子目录thumb用于存放缩略图
  if(file_exists($thump)){
  }else{
  mkdir($thump,0777);
  }
  $imgs = $newfilename;
  $imgss=$user_path."/".$imgs;
  $img_arr = getimagesize($imgss);
  $pecent = $img_arr[0]/$img_arr[1];
  $width = 200;    //这里是缩略图的尺寸,自行设置
  $height = 200/$pecent;
//下面是根据不同图片后缀,执行不同的图片生成代码
  if($_FILES["file"]["type"] == "image/png"){
    $img_in = imagecreatefrompng($imgss);
  }elseif($_FILES["file"]["type"] == "image/jpg" || $_FILES["file"]["type"] == "image/jpeg" || $_FILES["file"]["type"] == "image/pjpeg"){
    $img_in = imagecreatefromjpeg($imgss);
  }elseif($_FILES["file"]["type"] == "image/gif"){
    $img_in = imagecreatefromgif($imgss);
  }

  $img_out = imagecreatetruecolor($width, $height);
  imagecopyresampled($img_out, $img_in, 0, 0, 0, 0, $width, $height, $img_arr[0], $img_arr[1]);
  imagejpeg($img_out,$thump.$imgs,100);
  imagedestroy($img_out);
  imagedestroy($img_in);
  //这里最后输出缩略图的网址,让小程序读取到,用于放入input用来传到数据库中
   echo $imgurl.$imgpath."/thumb/".$newfilename;
}else
{
    echo "上传错误";
}
?>
这样,小程序上传图片,并生成原图、缩略图分类存放就完成了,如果是多图上传的,返回的是图片地址数组,上传数据库并后期调用的话,可根据自己需求,在提交时就通过for循环来依次提交,或者上传数据库后下次读取的时候再循环列出来,这个就自行处理吧
 Sham@双目瞿


评论前必须登录!
注册